Your first HTML5 project using Phaser Editor 2D, Webpack and TypeScript
Talking about HTML5, Javascript, Phaser and TypeScript.
If you are into HTML5 game development, especially if you are using Phaser, you should already know Phaser Editor 2D, an awesome IDE to create HTML5 2D games based on the popular Phaser framework.
Although it allows to build simple basic JavaScript games, Phaser Editor 2D gives its best using Webpack and TypeScript.
Let’s see a step by step tutorial to build this iconic Phaser example.
It’s a rotating Phaser logo, here it is built with Phaser Editor 2D.
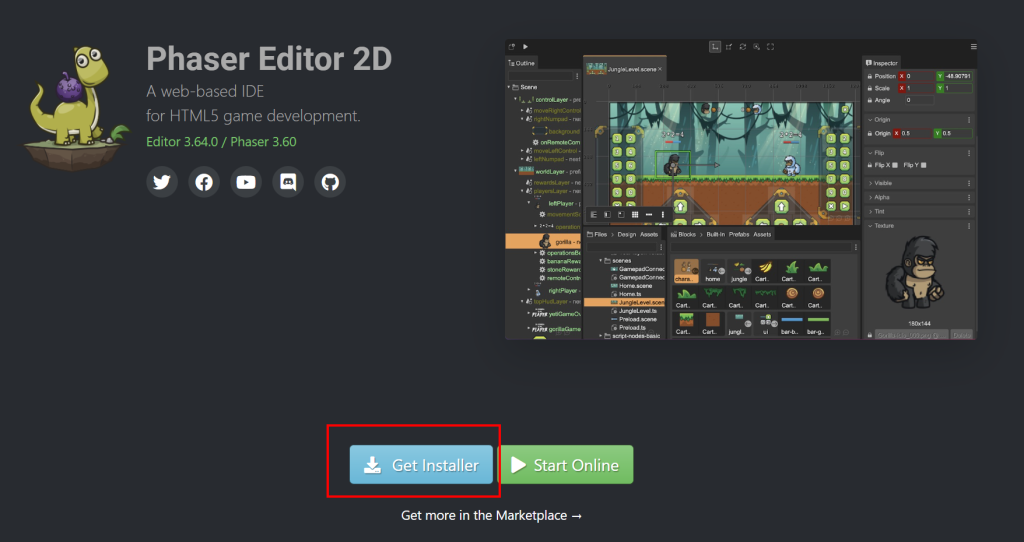
First, let’s download the installer from https://phasereditor2d.com/.
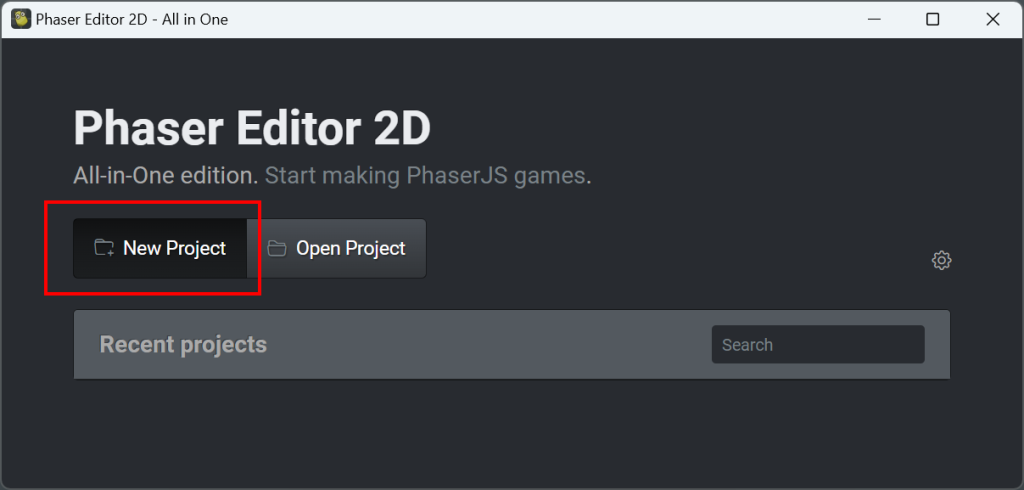
Once Phaser Editor 2D is installed on our computer, let’s launch it and select New Project.
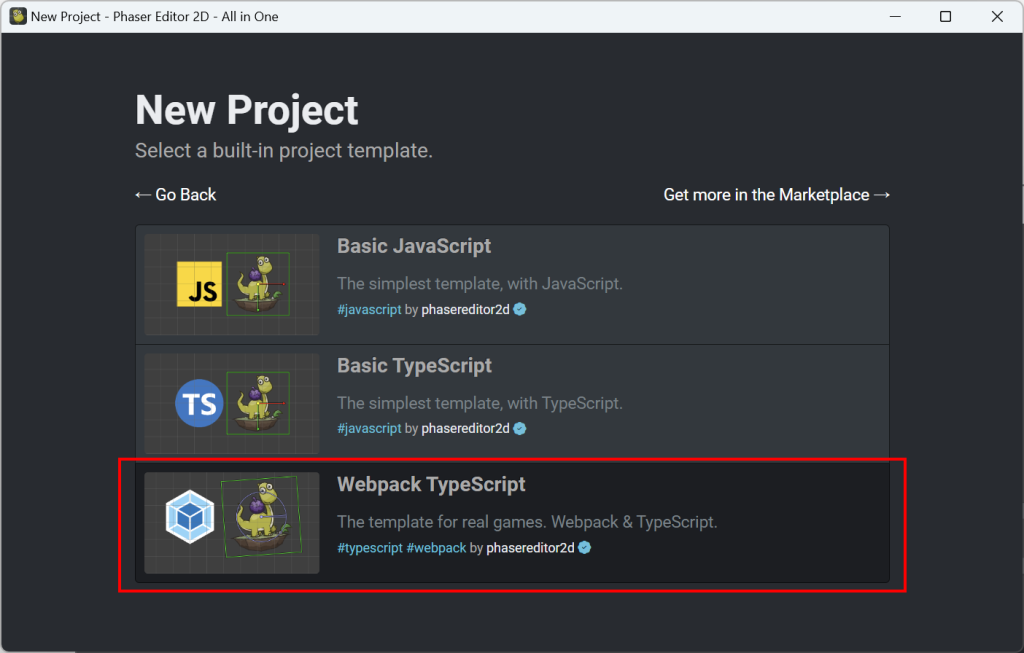
We can now choose among three built-in project templates, but we want to get the best from this software so let’s select Webpack TypeScript, the template for real games.
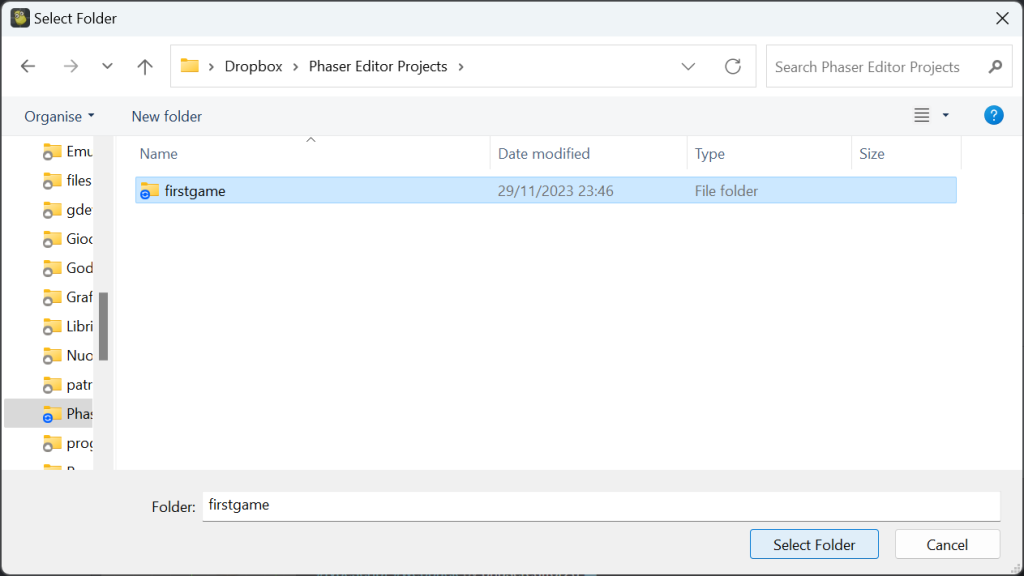
Now select a folder which will contain your project and you are ready to start. I create a new folder called firstgame but you are free to use your preferred name and path.
Just keep in mind I am referring to a folder called firstgame.
At this point, the IDE will open. What’s that icon on the top left corner? Let’s click on it to run the project in the browser.
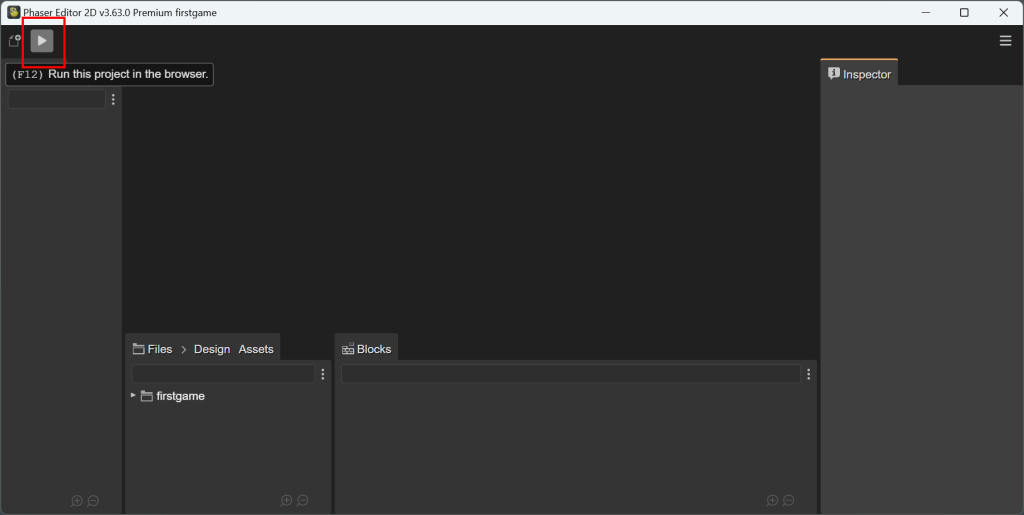
Nothing seems to happen, and we get an error. The site can’t be reached. This is because we did not set up the project properly.
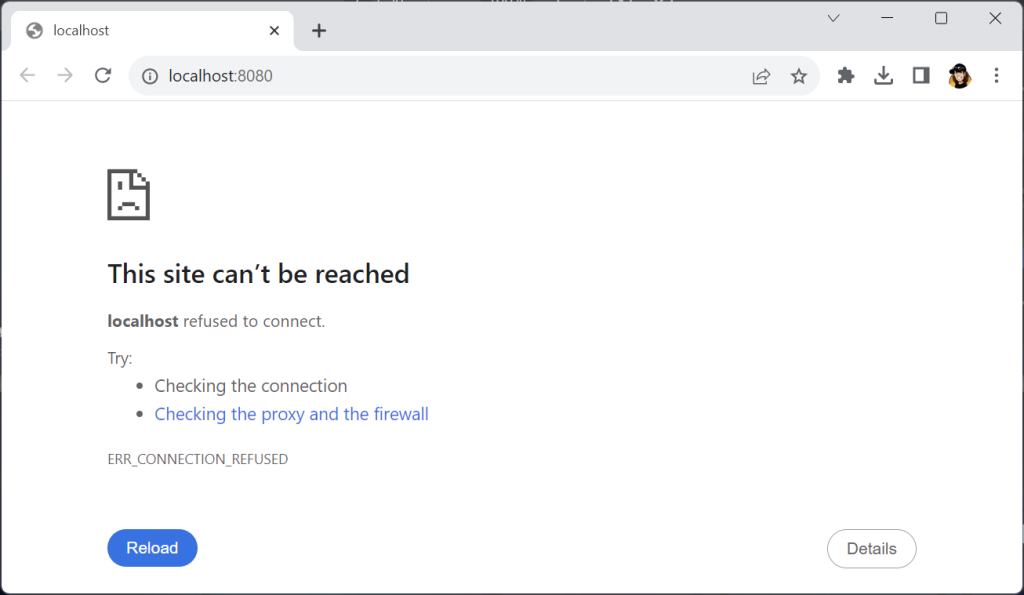
Time to play a bit with NPM. If you don’t now what is NPM, refer to the basic guide Node.js and NPM: don’t be afraid of them! to get you started in a matter of minutes.
Open a CLI, enter your Phaser 2D Editor project directory and launch:
npm install

After some seconds, all needed packages will be installed.
Now it’s time to start the web server with:
npm start

After some other seconds, you should see a message saying webpack compiled successfully.

And now the page works and renders the default Phaser 2D Editor template.
The web server will last until you stop the process or close the CLI.
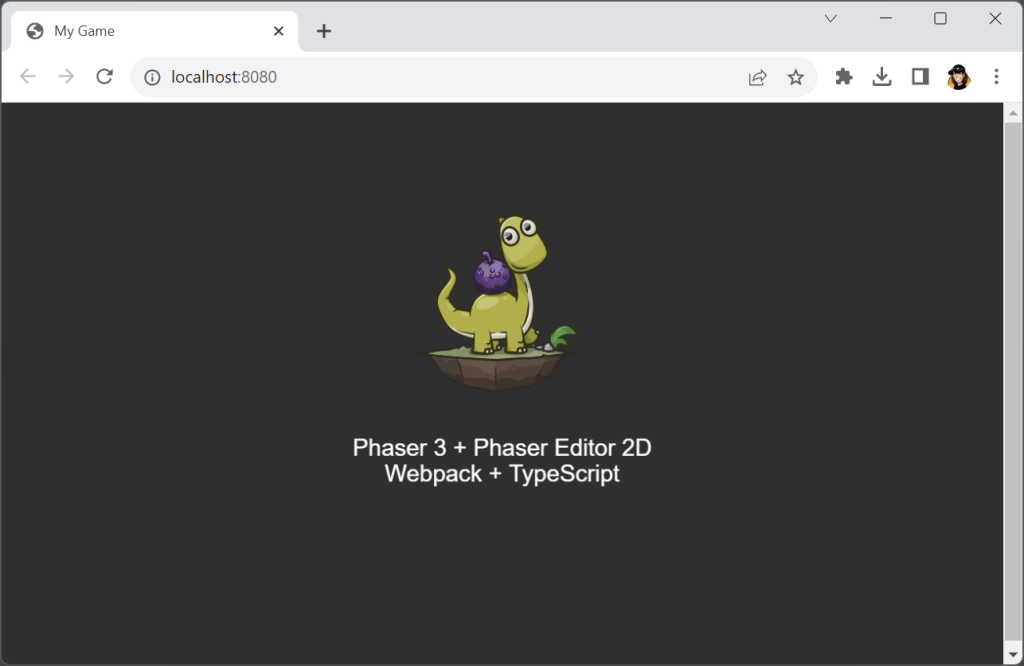
Time to change it to fit to our needs, so let’s have a look at its structure.
In Files panel, expand firstgame folder (your main folder could be named differently, according to the name you gave to your Phaser Editor 2D project) until you find src > scenes > Level.scene and expand it by double clicking on it.
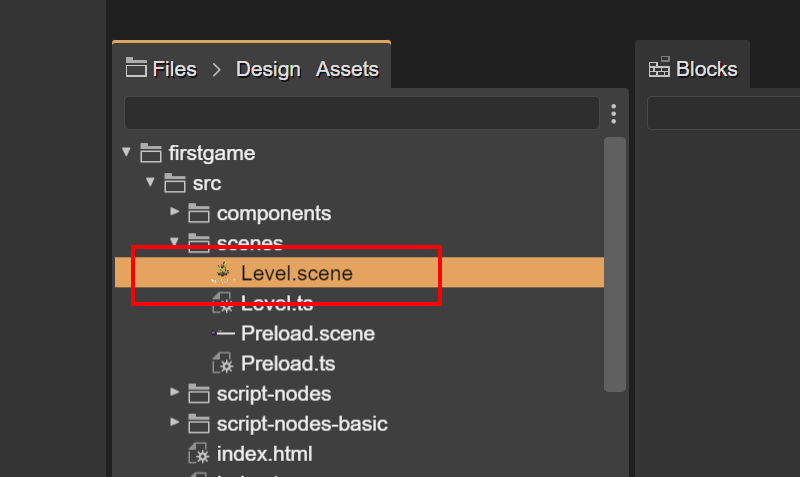
This is what you’ll see, and it’s the same stuff displayed in the browser.
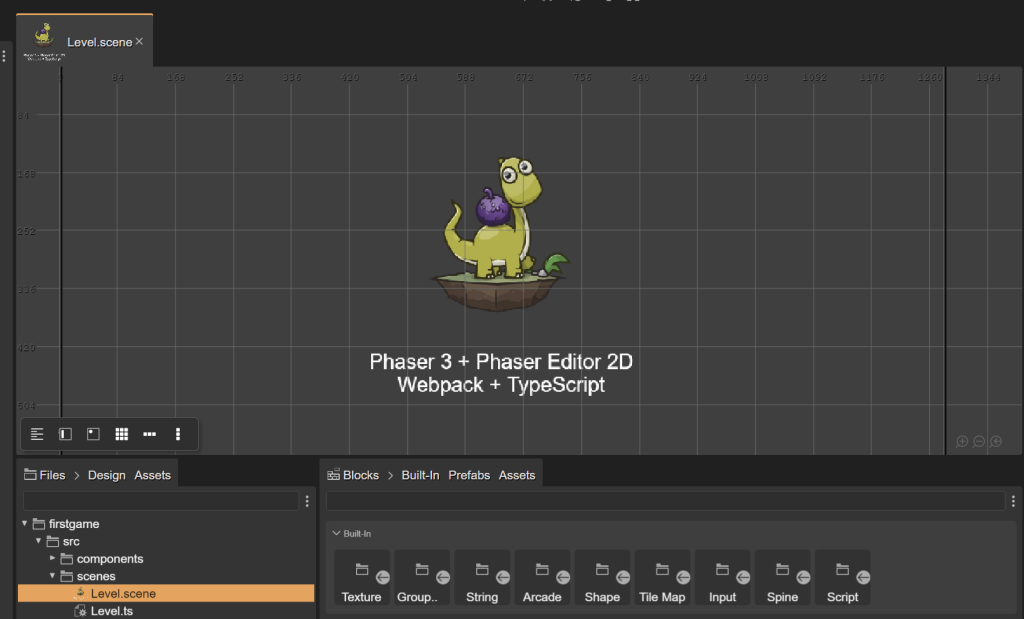
If you double click on the item below Level.scene, named Level.ts, you will see the source code:
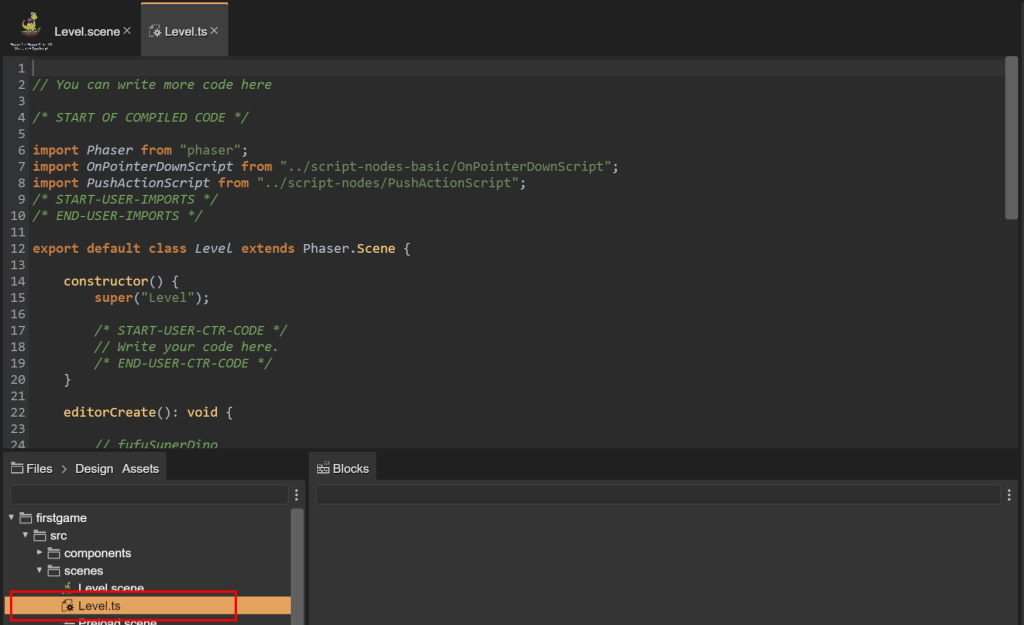
This is the source code of this example.
Simply have a look at it now.
// You can write more code here

/* START OF COMPILED CODE */

import Phaser from "phaser";
import OnPointerDownScript from "../script-nodes-basic/OnPointerDownScript";
import PushActionScript from "../script-nodes/PushActionScript";
/* START-USER-IMPORTS */
/* END-USER-IMPORTS */

export default class Level extends Phaser.Scene {

	constructor() {
		super("Level");

		/* START-USER-CTR-CODE */
		// Write your code here.
		/* END-USER-CTR-CODE */
	}

	editorCreate(): void {

		// fufuSuperDino
		const fufuSuperDino = this.add.image(640, 257, "FufuSuperDino");

		// onPointerDownScript
		const onPointerDownScript = new OnPointerDownScript(fufuSuperDino);

		// pushAction
		new PushActionScript(onPointerDownScript);

		// text
		const text = this.add.text(640, 458, "", {});
		text.setOrigin(0.5, 0.5);
		text.text = "Phaser 3 + Phaser Editor 2D\nWebpack + TypeScript";
		text.setStyle({ "align": "center", "fontFamily": "Arial", "fontSize": "3em" });

		this.events.emit("scene-awake");
	}

	/* START-USER-CODE */

	// Write your code here

	create() {

		this.editorCreate();
	}

	/* END-USER-CODE */
}

/* END OF COMPILED CODE */

// You can write more code here
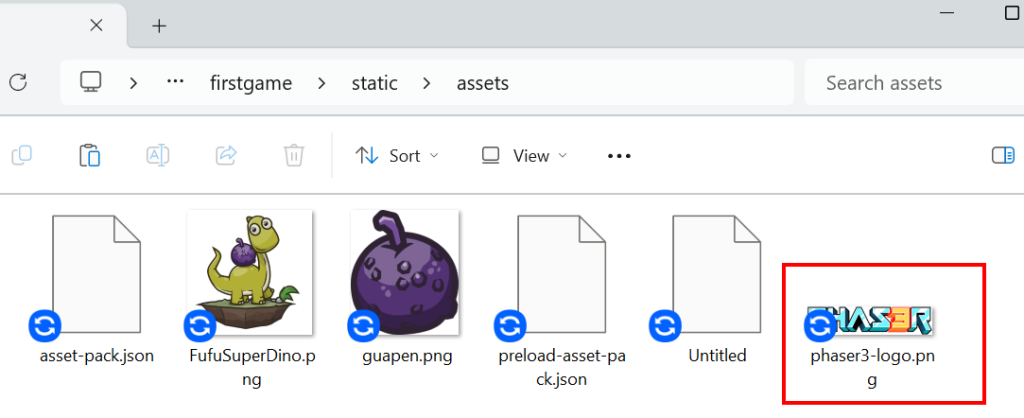
We have to replicate the Phaser example so the first thing is to add the Phaser 3 logo image in the same folder where the other assets are located, which in my case is firstgame > static > assets, this way:
Now head back to Files panel and double click on asset-pack.json to open the asset pack.
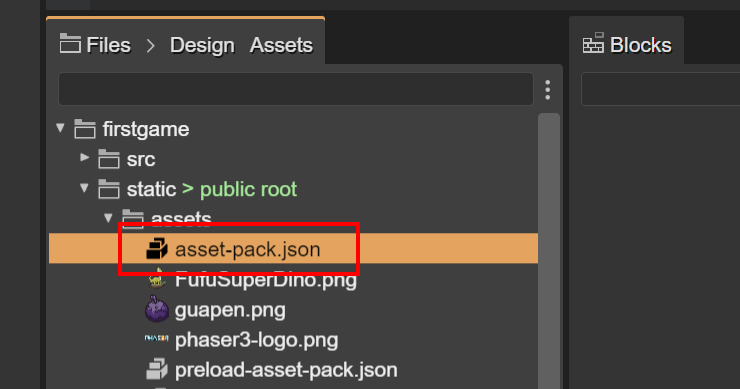
Phaser Editor 2D will open a panel with the assets used.
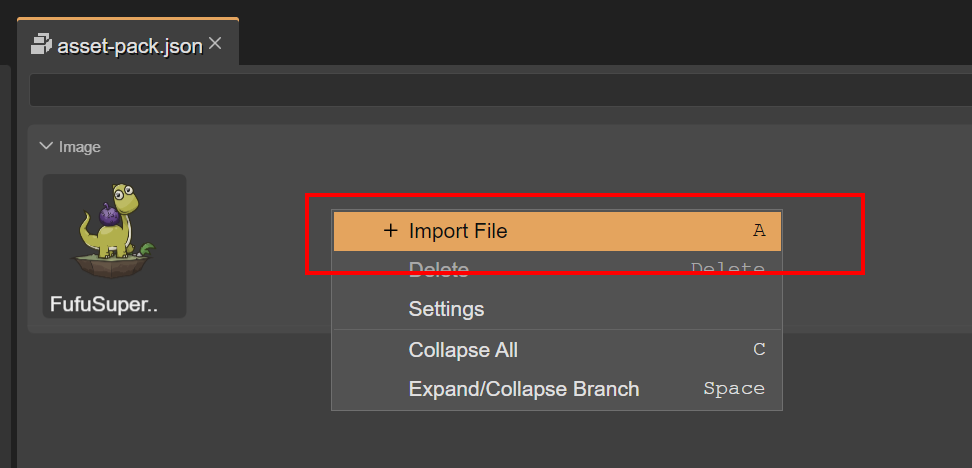
Right click in the panel and select Import File.
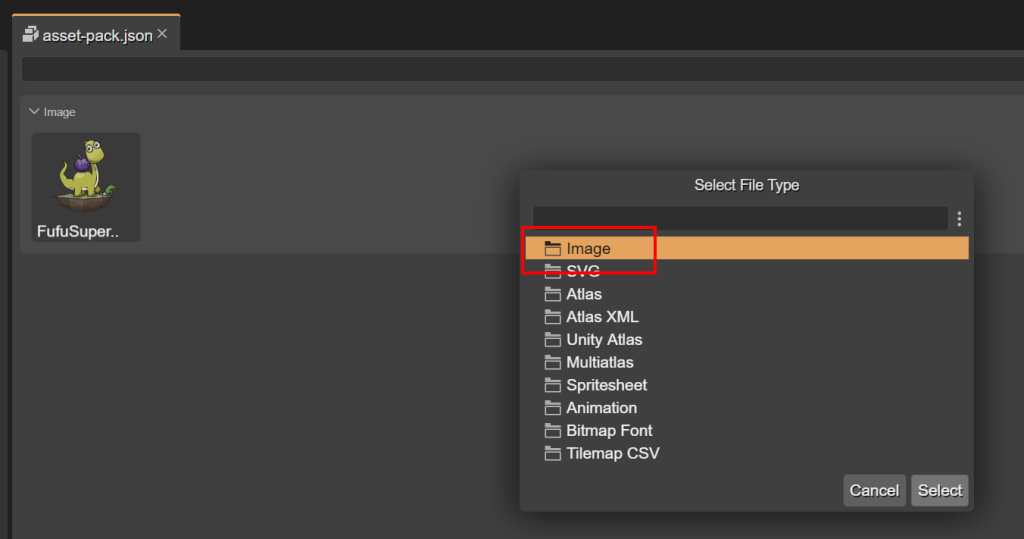
Then select Image.
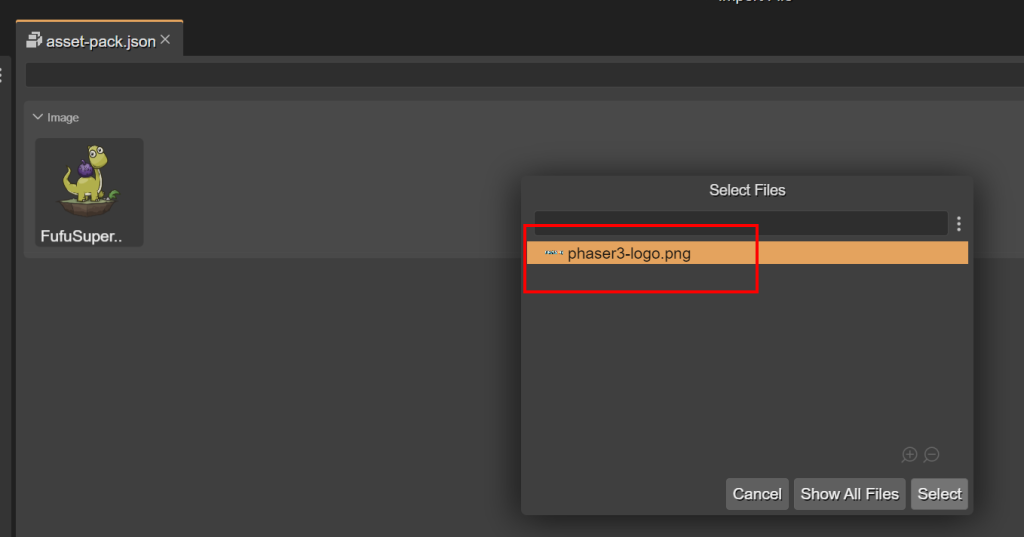
And finally the Phaser logo.
The logo will be added to the asset pack.
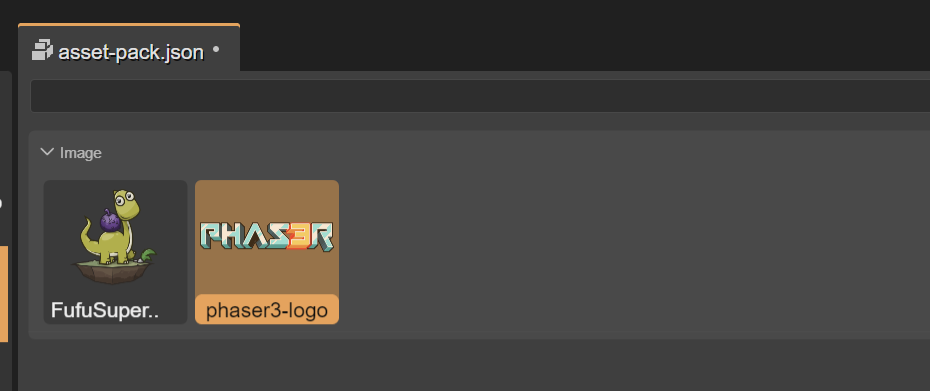
Unfortunately we do no need the poor dino anymore, so right click on it and select Delete.
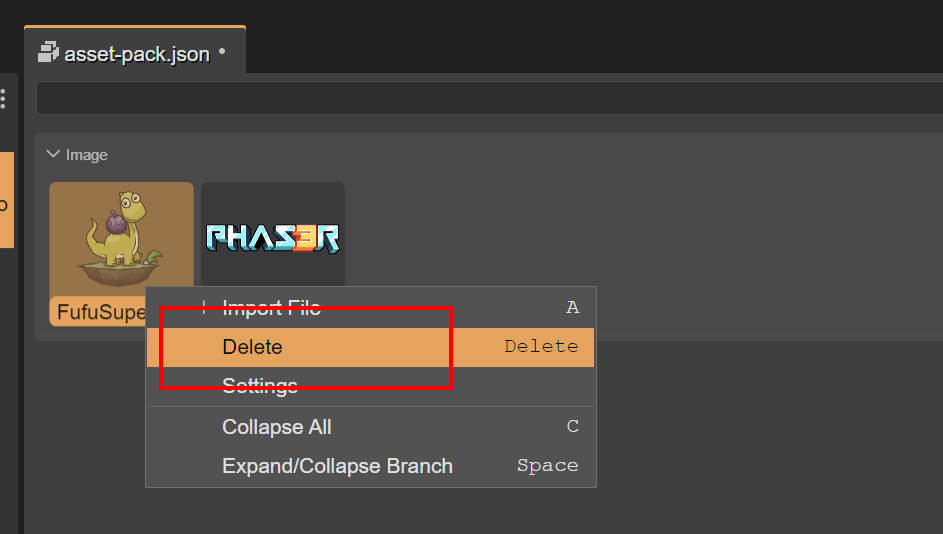
At this time the asset pack should contain only the Phaser 3 logo, so save it with Ctrl + S if you are on Windows or Command + S if you are on macOS.
Now let’s delete the dino image too from Files panel, by right clicking on it then selecting Delete.
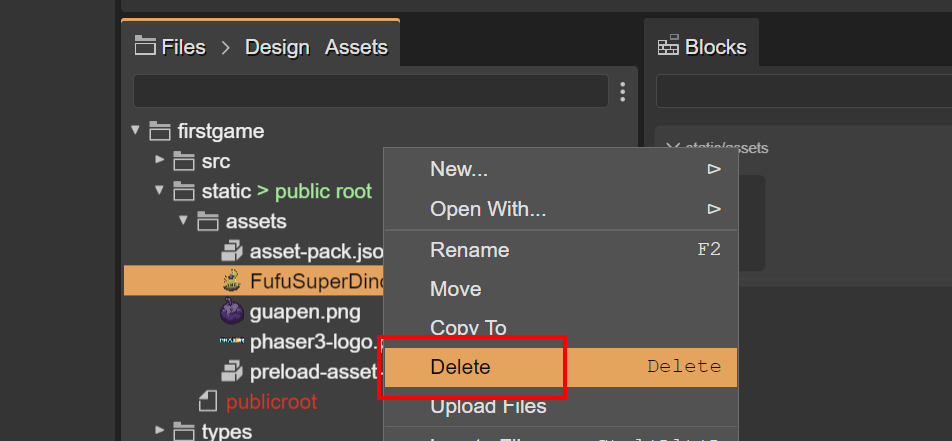
Now the Dino is gone for good, and if we double click on Level.scene we’ll see the Phaser image placehoder.
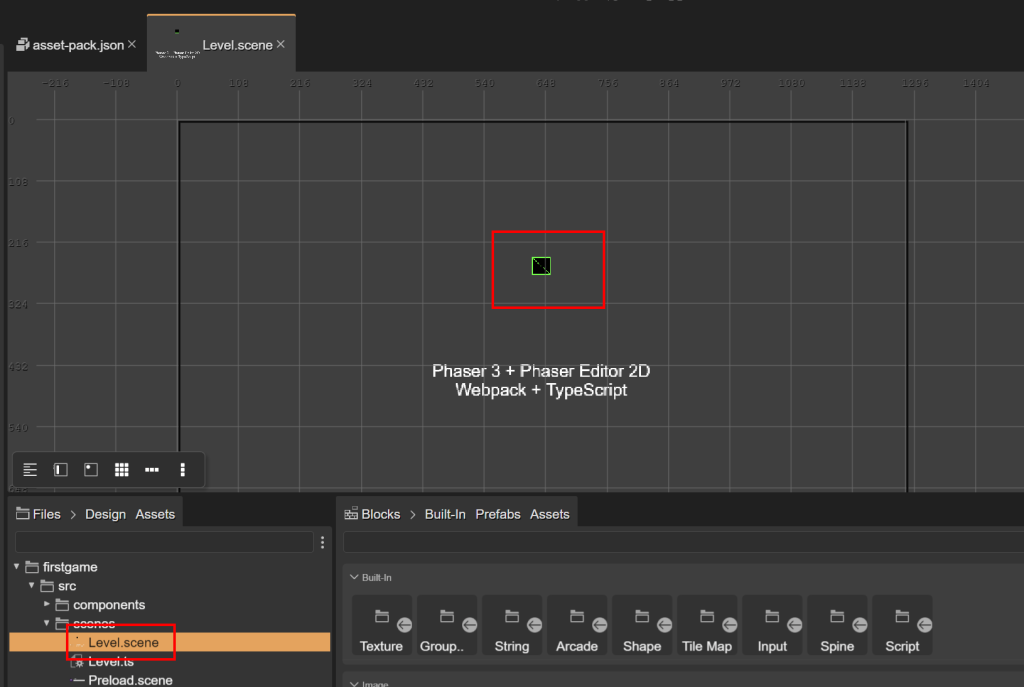
Let’s delete it by selecting it then right mouse click and Edit > Delete.

Do the same thing for the text too.
At this time we can finally add our logo, by dragging and dropping it from Blocks panel into the scene window.
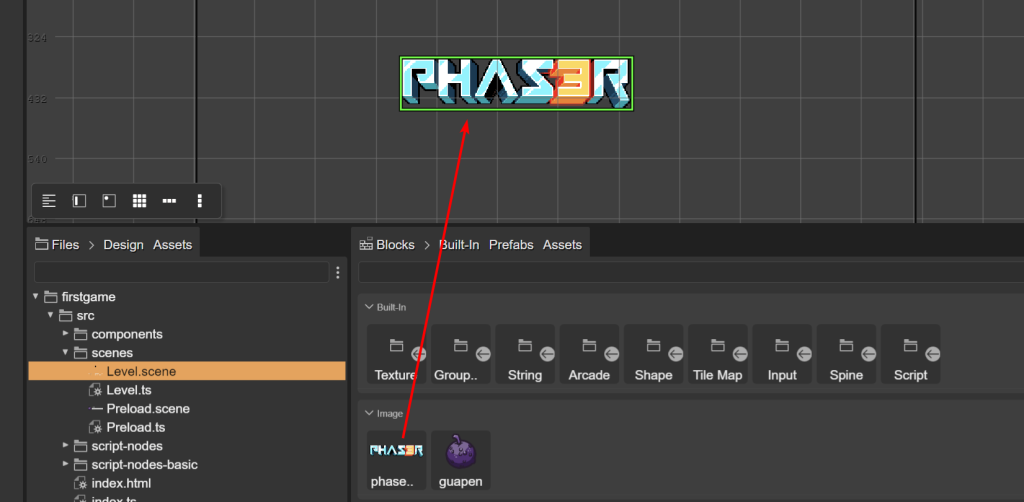
In the original example the logo is at position x = 400 and y = 300, so let’s assign the same values in the Inspector panel, also changing the scope to PUBLIC.

Save these last actions, then look at the modified Level.ts script.
// You can write more code here

/* START OF COMPILED CODE */

import Phaser from "phaser";
/* START-USER-IMPORTS */
/* END-USER-IMPORTS */

export default class Level extends Phaser.Scene {

	constructor() {
		super("Level");

		/* START-USER-CTR-CODE */
		// Write your code here.
		/* END-USER-CTR-CODE */
	}

	editorCreate(): void {

		// phaser3_logo
		const phaser3_logo = this.add.image(400, 300, "phaser3-logo");

		this.phaser3_logo = phaser3_logo;

		this.events.emit("scene-awake");
	}

	public phaser3_logo!: Phaser.GameObjects.Image;

	/* START-USER-CODE */

	// Write your code here

	create() {

		this.editorCreate();
	}

	/* END-USER-CODE */
}

/* END OF COMPILED CODE */

// You can write more code here
It’s quite different than before.
References to dino and texts are no longer there, replaced by lines of code about Phaser logo.
This is how Phaser Editor 2D works: you place assets on the scene, and it generates the code for you.
We managed to preload and add to canvas the Phaser logo with no code.
Now it’s time to animate it, by editing Level.ts script and add the highlighted lines:
// You can write more code here

/* START OF COMPILED CODE */

import Phaser from "phaser";
/* START-USER-IMPORTS */
/* END-USER-IMPORTS */

export default class Level extends Phaser.Scene {

	constructor() {
		super("Level");

		/* START-USER-CTR-CODE */
		// Write your code here.
		/* END-USER-CTR-CODE */
	}

	editorCreate(): void {

		// phaser3_logo
		const phaser3_logo = this.add.image(400, 300, "phaser3-logo");

		this.phaser3_logo = phaser3_logo;

		this.events.emit("scene-awake");
	}

	public phaser3_logo!: Phaser.GameObjects.Image;

	/* START-USER-CODE */

	// Write your code here

	create() {

		this.editorCreate();
	}

	update() {
		this.phaser3_logo.rotation +=  0.01;
	}

	/* END-USER-CODE */
}

/* END OF COMPILED CODE */

// You can write more code here
This will make Phaser logo rotate like in the official example.
Save, then in Files panel open index.ts:
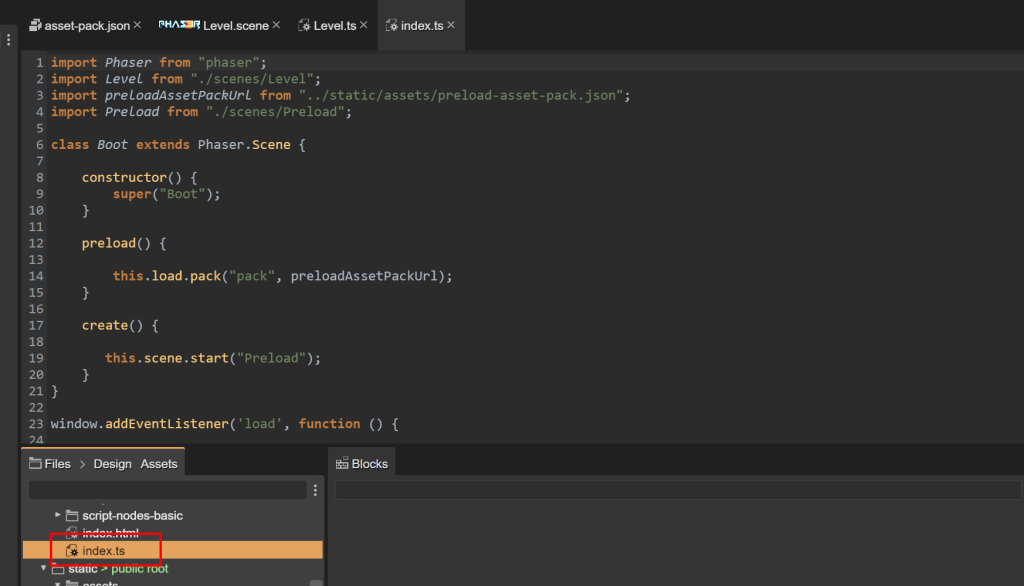
This is the content of index.ts:
import Phaser from "phaser";
import Level from "./scenes/Level";
import preloadAssetPackUrl from "../static/assets/preload-asset-pack.json";
import Preload from "./scenes/Preload";

class Boot extends Phaser.Scene {

    constructor() {
        super("Boot");
    }

    preload() {

        this.load.pack("pack", preloadAssetPackUrl);
    }

    create() {

       this.scene.start("Preload");
    }
}

window.addEventListener('load', function () {

	const game = new Phaser.Game({
		width: 1280,
		height: 720,
		backgroundColor: "#2f2f2f",
		scale: {
			mode: Phaser.Scale.ScaleModes.FIT,
			autoCenter: Phaser.Scale.Center.CENTER_BOTH
		},
		scene: [Boot, Preload, Level]
	});

	game.scene.start("Boot");
});
So we can change width, height and background of the Phaser canvas this way:
import Phaser from "phaser";
import Level from "./scenes/Level";
import preloadAssetPackUrl from "../static/assets/preload-asset-pack.json";
import Preload from "./scenes/Preload";

class Boot extends Phaser.Scene {

    constructor() {
        super("Boot");
    }

    preload() {

        this.load.pack("pack", preloadAssetPackUrl);
    }

    create() {

       this.scene.start("Preload");
    }
}

window.addEventListener('load', function () {

	const game = new Phaser.Game({
		width: 800,
		height: 600,
		backgroundColor: "#000000",
		scale: {
			mode: Phaser.Scale.ScaleModes.FIT,
			autoCenter: Phaser.Scale.Center.CENTER_BOTH
		},
		scene: [Boot, Preload, Level]
	});

	game.scene.start("Boot");
});
Now the result will be absolutely identical to the original file.
Save, then stop the server and launch
npm run build
After some seconds you’ll have your project compiled and ready to be distributed.

Just check the dist folder in your project folder.

And this is how you set up, build and export a Phaser Editor 2D project.
Next time I’ll show you how to create an actual game prototype.
Never miss an update! Subscribe, and I will bother you by email only when a new game or full source code comes out.

