Create a Flash page flip gallery in five minutes with Project ROME
Project ROME is an all-in-one content creation and publishing application that lets virtually anyone at work or home inject the power of graphics, photos, text, video, audio and animation into everyday projects. With ROME you can create everything from printed materials and presentations to digital documents and websites, with a simple and creative environment.
Initially intended to have an educational and a professional version, at the moment the project seems to be discontinued although you can still use the professional version for free. For more information and the latest details, check the official discussion.
Anyway, while the web application is still available, that’s what you can do once you point your browser to http://rome.adobe.com/APP/index.html.
We are going to create a Flash page flip gallery like this one:
Click on the arrow to turn pages.
Check this step by step tutorial:
From the main launch bar, select CREATE NEW, then Blank for Screen -> Average Screen and set document size to 640×480.

Once you are in front of your blank document, select Insert -> Media Objects -> Layer stack. A layer stack can contain any number of elements ordered in layers. This is where we will place the photos.

You layer stack will appear in the middle of the canvas. On the upper right corner you can spot a pencil icon.

Selecting the pencil icon you can open a menu. Select Size and define it as 600×400. Also move the registration point to the upper left corner.

Now drag the layer stack to 20,20.

Double click on the layer stack and you can directly edit it. Notice in the upper left part of the work area it says you are working on layers.

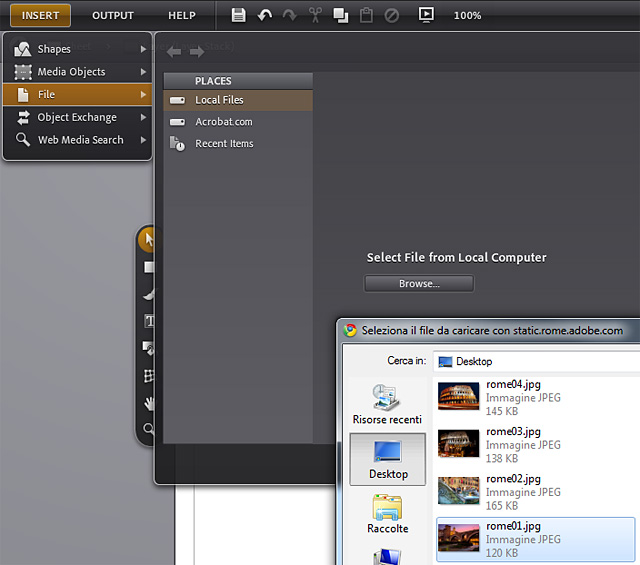
Select Insert -> File -> Local Files and the file dialog will appear. Select an image from your hard disk. Being a ROME gallery, I’ll use photos of Rome. I took them from Flickr, and I am sorry if I infringed some copyright. Oh well.
Move the registration point to upper left corner, then using the pencil icon select Transform and resize and position the image, if needed, to completely fill the layer stack.

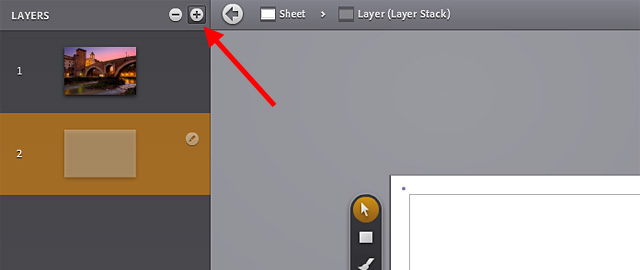
Clicking the plus icon in the layers panel you can add as many layers as you want.
Once you added and adjusted all images, use the pencil icon (you will always use pencil icon to call contextual menus) to select Transition -> Effect -> Page Flip. Select the transition for each image, then click on the left arrow in the toolbar to return to main canvas.

Insert another layer stack.

Transform the layer stack to fit in the bottom right angle. This will be the button to make pages turn.

Double click on the layer, then select Insert -> Shapes -> Arrows -> Arrow.

Transform the arrow to completely fit into the layer stack.

Selecting Style you can define a fill color.

Here it is your arrow. Now we’ll create an hover effect. Select the arrow then Edit -> Copy.

Create another sublayer clicking the plus icon, then Select -> Paste.

Give the new arrow a different color to simulate the hover effect.

Now it’s time to bind some event with Advanced -> Event Settings -> Standard Events

Then you should follow the below picture to edit the Mouse Enter event and select the second arrow layer. The menu will self create from step to step, so it would be quite hard to describe it with words.

Do the same thing for the mouse exit event, selecting the first arrow layer.The hover effect is ready.

Also edit the click event to go to next layer in the photos layer. The gallery is ready.

Select Output -> File Export -> SWF

Finally give it a name and save it on your hard disk.

Congratulations! You made it. I hope Adobe will change its mind about ROME future.
If you have problems with the tutorial, download the source code and open it directly in ROME.