Build endless runner games in Unity without writing a line of code with Infinite Runner Engine
Talking about C#, Game development and Unity3D.
I want to start this post telling you two things: first, I hate “no coding” tools. Once you played and edited a bit the two or three demos usually shipped with the package, you will end spending more time trying to figure out how to make the engine “do stuff” rather than learning a programming language. But this is not the case, since you can actually build a game without writing a line of code but you can also – and you are encouraged to – edit and improve the C# scripts to make the game work the way you want, or maybe you can just have a look at the source code to get inspiration for your own scripts.
Second, there are a lot of useful Unity assets allowing you to speed up game development without having to reinvent the wheel. I am trying a lot of them, from scripts to create tweens to more complex assets like the one I am showing you today.
It would interesting to know if you like these kind of posts, there is a lot of useful stuff to discover.
We’ll start with the Infinite Runner Engine
The idea behind the Infinite Runner Engine is to give you everything you need to create games with a gameplay ranging from Flappy Bird to Temple Run, basically any game where stuff comes at the player.
With a powerful mix of spawners and object pooling, you can span everything you want while keeping the game optimized. Remember that in an endless runner engine, the player is not running, the entire environment is moving towards the player.
I tried the engine for a couple of hours, here is what you can do:
Once you imported the package, your Unity project starts like any other Unity project you arealdy built, with an empty scene. We are going to create a 16/9 scene because we’ll build a horizontal endless runner.

We start working with the infinite runner engine by finding and adding to the scene the StartingPosition prefab. If you don’t know where to find it inside the package, just enter its name in the search field.

Once you found the StartingPosition prefab, simply drag into the scene. This is where the character – or characters – you control will start playing.

Now it’s time to look for Managers prefab.

Managers too will be added to the scene.

Now it’s time to create an empty object in the Hierarchy window. This will be used to add an important component.
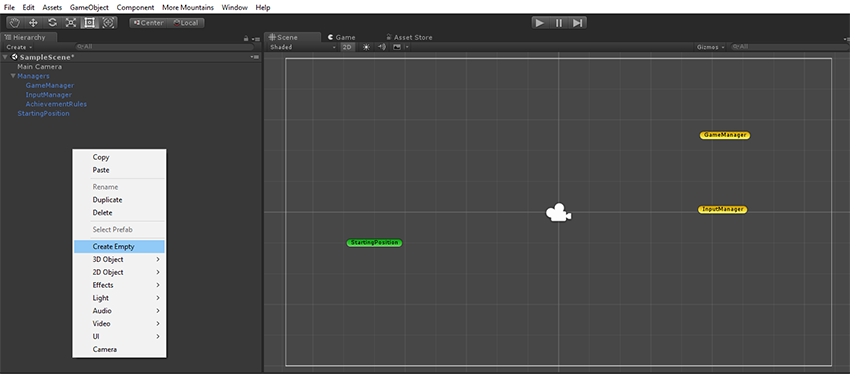
In the Inspector window, all Level Manager component. Use the search field to find it quickly.

Now the most important part in an endless runner game: the player and the platforms. Import the assets, you may want to add PNG images.

Here they are, the platform and the player images.

We need to add some components to both the player and the platform, so let’s start by adding the player to the scene.

Add the Box Collider 2D component.

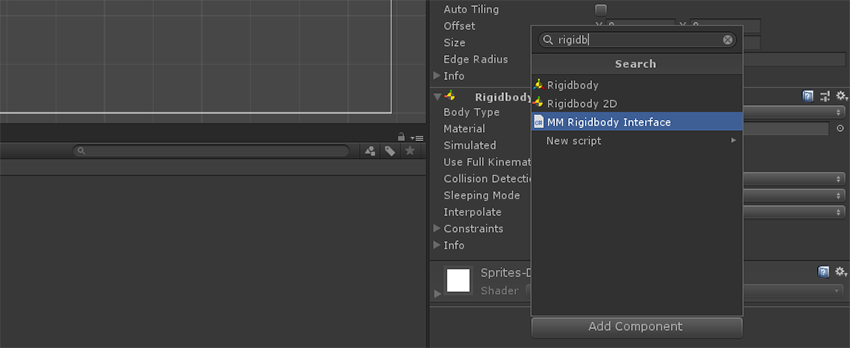
Then a Rigidbody 2D component. Both this component and the Box Collider 2D component are standard Unity components.
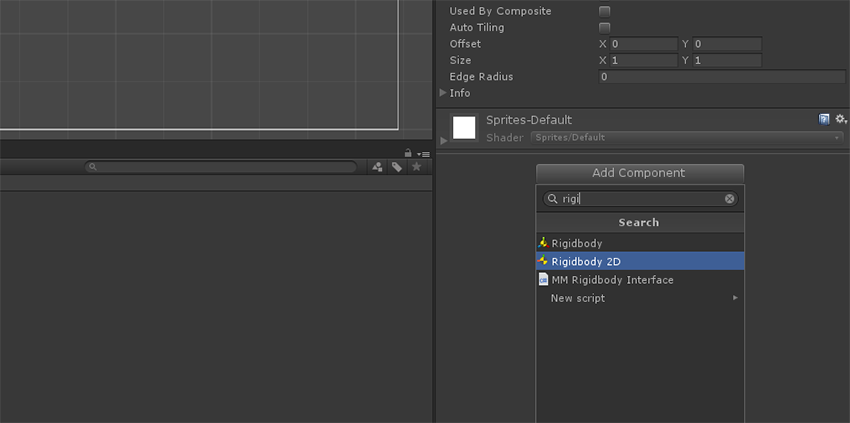
MM Rigidbody Interface is the first infinite runner engine custom component we will add to the player.

Jumper component is the last component we need to add to the player.

Dragging the player from Hierarchy window to Project window will create a new prefab with the player image and all the components required. Now you can delete the player from the scene, it will be added once the game runs.

Now it’s time to add components to the platform. Drag it into the scene.

Add the Box Collider 2D component.

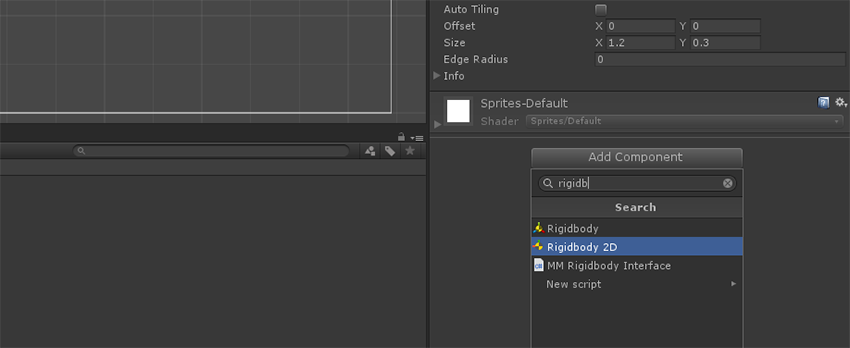
Then a Rigidbody 2D component, just like you made with the player.
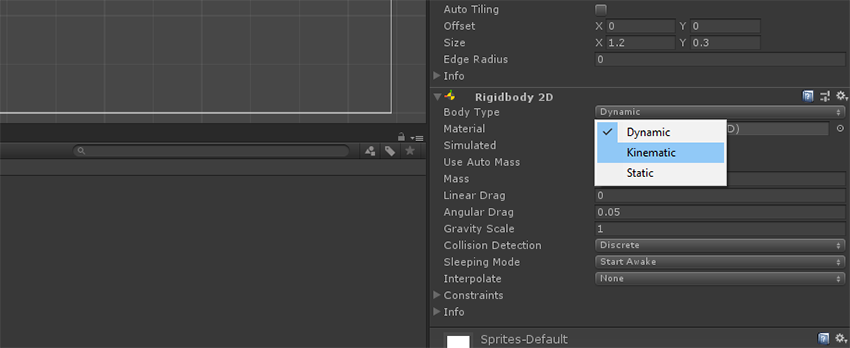
The rigid body must be set from Dynamic to Kinematic. A Kinematic body is not driven by the physics engine, and can only be manipulated by its Transform. This is useful for moving platforms, like the ones of our endless runner.
MM Rigidbody Interface is also needed.
And Moving Object too. Remember in an endless runner the player does not move, it’s the entire environment which moves towards the player.
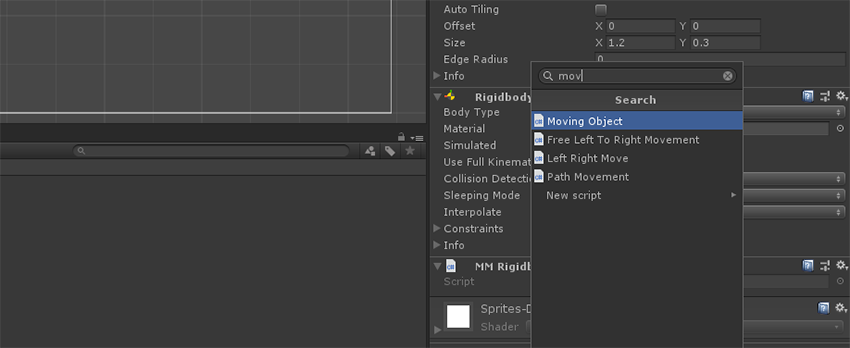
Let’s give the platform a speed.

Adding MM Poolable Object will make the platform poolable. Object pooling is very important when looking for performance. To know more about object pooling, have a read at this post.

Normally we pool and recycle an object when it’s not needed anymore, normally when it’s destroyed, collected or, like our platforms, when they are out of bounds. That’s why we are adding Out Of Bounds Recycle component.

Setting the layer to Ground will tell the engine that the platform is something walkable.

Just like we did with the player, drag the platform from Hierarchy window to Project window to create the prefab.
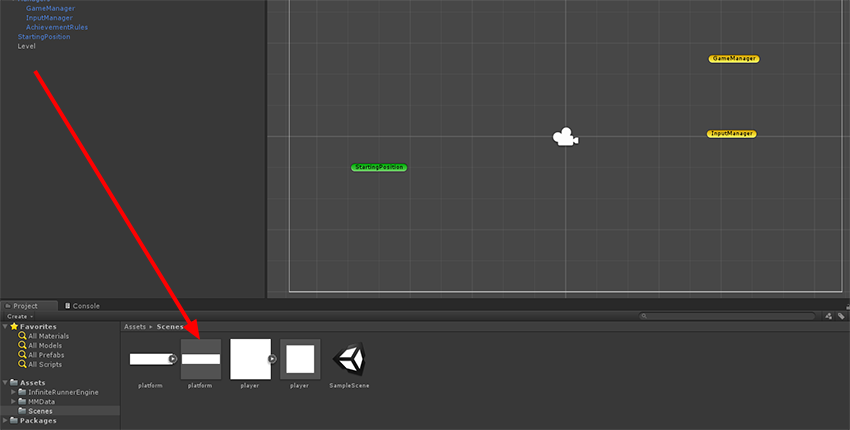
Back to the LevelManager component, let’s tell the engine we want one player and that it will be our player prefab. Drag the player prefab into Element 0 field or click the small circle then select the player prefab from the list.

Do the same thing with the starting position.

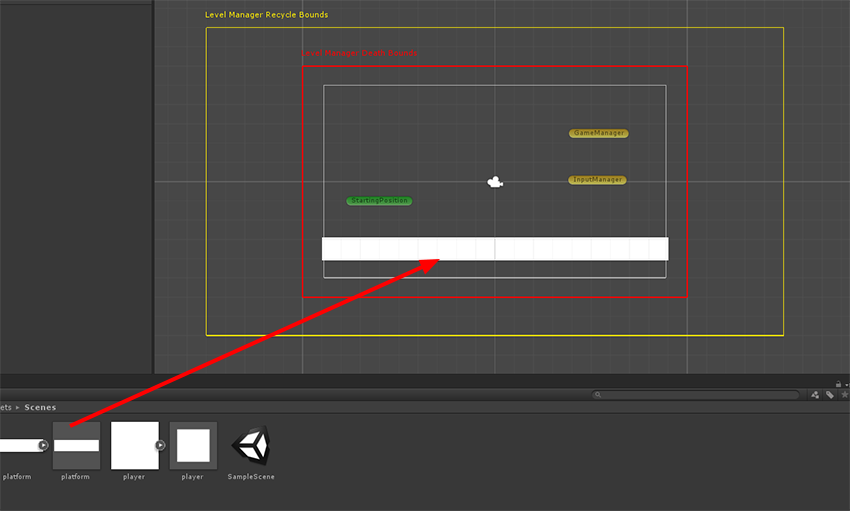
Recycle Bounds and Death Bounds set an area, and outside such area platforms will be recycled and player will die. Set their sizes to make them a little wider than the game area.

Now let’s add a platform prefab to the scene, resizing it to make it big enough to let the player run safely for some time before the actual game begins.
Now, the last empty object to create.

Add MM Simple Object Pooler component.

Also add a Distance Spawner component. These two components will handle object pooling.
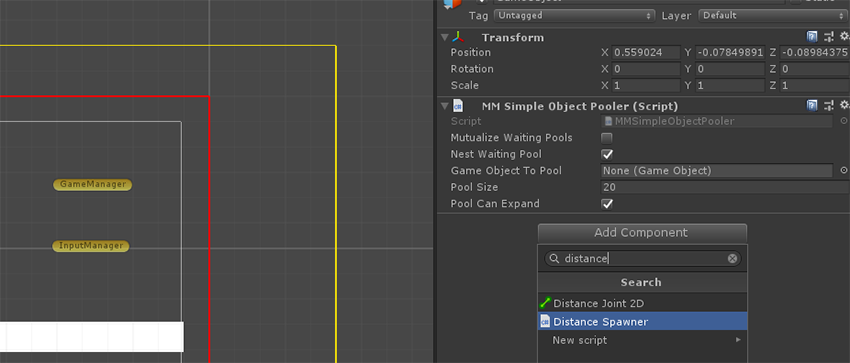
Place the distance spawner at the end of the starting platform, to make random platforms appear as soon as the starting platform ends. This is where the actual game begins.

Add platform prefab to Game Object to Pool field.

And finally play with clamp, size and gap between platforms to give randomness to the game.

And once you run the game, here it is your endless runner with triple jump and increasing difficulty:

It’s a very basic prototype, but you can add a lot of options and components, or edit them to fit your needs – they are written in C# – or even add your own components.
Soon I will show you a complete game built with , it would be interesting to know if you are willing to use Unity assets to speed up your development process.
Never miss an update! Subscribe, and I will bother you by email only when a new game or full source code comes out.


