

Capacitor “Hello World” example: how to convert your web applications to native iOS applications
Talking about iOS.
Did you enjoy the guide about converting your web applications to native Android applications?
Now I am showing you how to convert your web applications to native iOS applications. Just like the Android version, we’ll be using Capacitor, and just like the Android version, there are some prerequisites to fullfill:
1 – You should have a macOS computer.
2 – You should have Node.js installed.
3 – You should have Xcode installed.
4 – You should have CocoaPods installed.
While Xcode is just a software to install, if you aren’t familiar with Node.js (and npm), here is a guide about their installation: Phaser and the migration from JavaScript to TypeScript – Step 1 – Node.js.
About CocoaPods, if don’t have luck with the default installation command to be entered from a shell:
sudo gem install cocoapods
You may need to install Homebrew and Command Line Tools for Xcode.
I was among the unlucky ones, so this guide starts from the installation of the Command Line Tools for Xcode. If you are among the lucky ones, skip Command Line Tools, Homebrew and CocoaPods installation steps.
Go to Apple Developer Downloads page, search for “command line tools” then download and install the version which matches with your Xcode version. You may need to be registered as an Apple developer.

With Command Line Tools for Xcode installed, you can now install Homebrew with:
/bin/bash -c "$(curl -fsSL https://raw.githubusercontent.com/Homebrew/install/HEAD/install.sh)"
And you will be prompted to press RETURN or ENTER to continue

Press ENTER to complete Homebrew installation.

With Homebrew installed, we can finally install CocoaPods with
brew install cocoapods
And at this time you have everything you need to start using Capacitor.

Once your system is ready, create a folder for your new project. I created one called hellocapacitormac but obviously it’s up to you to create the folder with the name you want.
Then, inside your folder, create another folder called www and copy your project inside such folder. Remember your project must have a file called index.html
As for my project, it’s just a single HTML file called index.html with this content, just like in the Android version.
<html>
    <head>
        <style>
            body {
                background-color : #242444;
                color : #f5f5f5;
                font-family : arial;
                text-align : center;
                margin : 10px;
            }
        </style>
    </head>
    <body>
        <h1>Hello, Capacitor!</h1>
    </body>
</html>
Capacitor wants your project to be a Node.js project, so let’s open a shell if you didn’t already and once in the project folder, let’s execute:
npm init
to initialise the project as a Node project. Then answer or skip all questions, it does not matter at the moment, as we only need Capacitor to see we are working on a Node project.

This should be the content of your project folder now:

Unlike in Android process, we don’t have any new folder called node_modules, we only have a new file called package.json with this content:
{
  "name": "hellocapacitor",
  "version": "1.0.0",
  "description": "",
  "main": "index.js",
  "scripts": {
    "test": "echo \"Error: no test specified\" && exit 1"
  },
  "author": "",
  "license": "ISC"
}
Now we are going to install Capacitor, with:
npm install --save @capacitor/core @capacitor/cli @capacitor/ios
This will install all required Capacitor libraries and dependencies.

Now your package.json file should have some more rows:
{
  "name": "hellocapacitormac",
  "version": "1.0.0",
  "description": "",
  "main": "index.js",
  "scripts": {
    "test": "echo \"Error: no test specified\" && exit 1"
  },
  "author": "",
  "license": "ISC",
  "dependencies": {
    "@capacitor/cli": "^3.5.0",
    "@capacitor/core": "^3.5.0",
    "@capacitor/ios": "^3.5.0"
  }
}
Let’s create a new Capacitor project with:
npx cap init
Again, you can answer or skip all the questions, it does not matter at the moment.

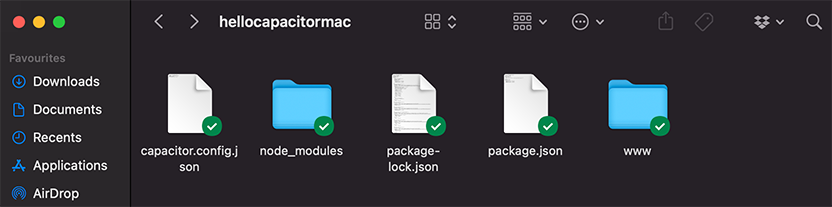
Now your project folder should look this way:
Once the project has been crated, you’ll have to add the platforms you want to publish on. Since we are trying to publish on iOS, let’s execute:
npx cap add ios
Remember that you must be working on a macOS computer if you want to publish on iOS devices.

A new folder called ios should have been created in your project folder:

Finally we can open Xcode with the newly created project with:
npx cap open ios
This will open Xcode.

Look, our app has been copied into ios/App/App/public folder.

Now it should be easy to select a device to emulate.

Finally you can run the project, and here is the web app running in an iPhone 8 like a native app.

And this is how it ends the first step of this journey. Next time, we’ll start to publish on actual devices rather than simulators.
Never miss an update! Subscribe, and I will bother you by email only when a new game or full source code comes out.