Develop, build and distribute your HTML5 Phaser games with Vite
If you are trying to develop HTML5 games, or any other application that uses JavaScript, sooner or later you will come across the request for installing Node.js and npm.
I already addressed this topic with the tutorial series started with Node.js and NPM: don’t be afraid of them! and I also released a free minibook covering everything you need to start working with Phaser, Node.js, Webpack and TypeScript.
Tecnlogy, however, is always evolving and it seems there is a new sheriff in town: Vite.
Vite (French word for “quick”) is a modern, fast, and lightweight build tool and development server for web applications.
It was created by Evan You, the creator of Vue.js, with the goal of improving the development experience by focusing on performance and speed.
Vite is designed to work seamlessly with both small and large-scale projects, offering a significant improvement over traditional bundlers like Webpack, especially during development.
Setting up a project with Phaser and Vite is quite easy if you are already comfortable with Node.js and npm. If you aren’t, as said, check Node.js and NPM: don’t be afraid of them! tutorial series.
Create a TypeScript Vite Project
With PowerShell or your favourite command-line shell, grom the directory in which you want to create your TypeScript Vite project, write:
npm create vite@latest
and you will be asked to give your project a name – I named it vite-phaser – then to select a framework.
Choose Vanilla and then TypeScript, this way:

At this time you will be prompted to enter some more commands from the shell, but let’s make things quicker and open Visual Studio Code, opening the folder Vite has just created.
In my case is vite-phaser folder because this is how I called the project.
Now go to Terminal -> New Terminal, then enter
npm install
This way:

Now your project is ready to be run, with
npm run dev
This way:

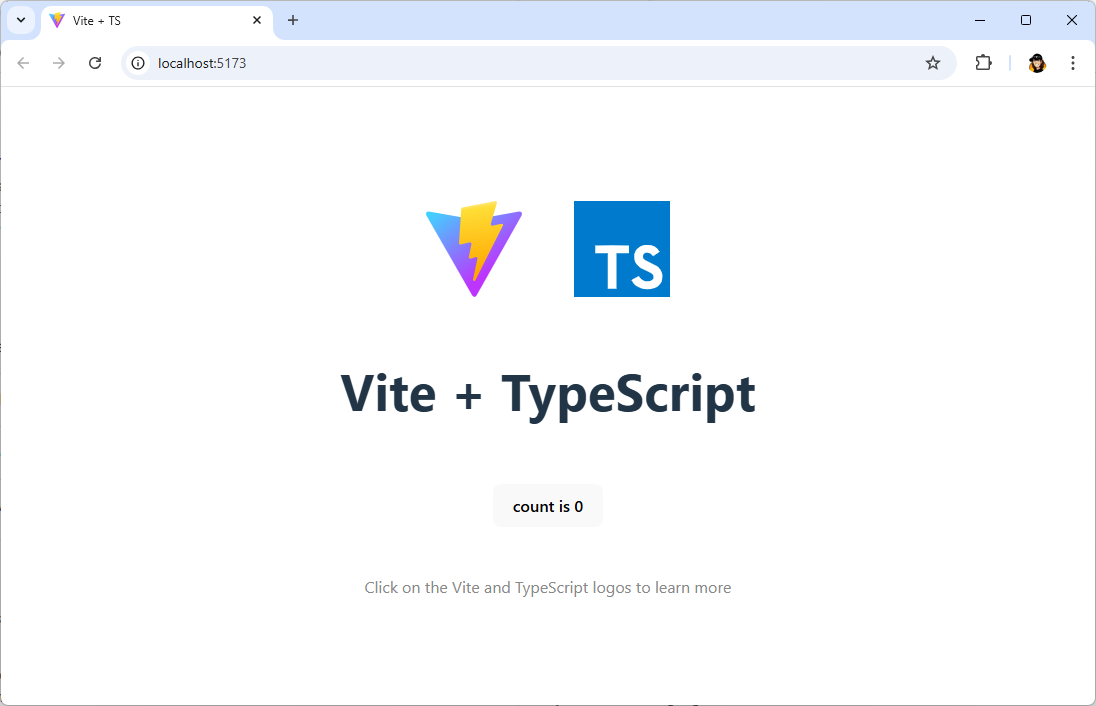
Now, if you point your browser to http://localhost:5173/, or any address shown in the terminal, you should see the default Vite project, this one:
At this time, we are ready to make some changes, but first let’s have a look at the files in the project.
The structure of a Vite project
Let’s have a look at the tree in Explorer panel:

From top to bottom we can find:
node_modules folder: contains all the dependencies that are required for the application to run, and must not be touched.
public folder: special directory used to store static assets that should be served as they are, without any processing or transformation during the build process. Any files placed in this folder are copied directly to the root of the final build output without modifications, making it an ideal place for assets like images, fonts, or static configuration files.
src folder: special directory where the core source code of our application resides. It contains all the TypeScript scripts and other files which will be processed, transformed, and bundled by Vite when creating a production build.
src\vite-env.d.ts: TypeScript declaration file that provides type definitions for Vite-specific features and configuration. Don’t touch it as we will remove it.
.gitignore: configuration file used in Git repositories to specify intentionally untracked files that Git should ignore. It helps prevent certain files, directories, or patterns from being included in version control. If you don’t use Git, you can delete it.
index.html: the entry point of the application. Think about it as the home page.
package.json: core component of a Node.js project, used to manage project metadata, dependencies, scripts, and configurations.
package-lock.json: file automatically generated that ensures consistency in dependency management. Unlike package.json, this shouldn’t be manually edited.
tsconfig.json: configuration file used in TypeScript projects to specify compiler options, defining how TypeScript should transpile code and what features to enable.
Let’s start to adjust the project to our needs.
Adjusting Vite project to work with Phaser
In order to work with Phaser, we must first install Phaser, but at the moment let’s have a look at package.json file:
{
  "name": "vite-phaser",
  "private": true,
  "version": "0.0.0",
  "type": "module",
  "scripts": {
    "dev": "vite",
    "build": "tsc && vite build",
    "preview": "vite preview"
  },
  "devDependencies": {
    "typescript": "~5.6.2",
    "vite": "^6.0.5"
  }
}
To install Phaser, and then see what changes, write in Terminal:
npm install phaser
This way:

Now if you look at package.json, you should see these new lines:
{
  "name": "vite-phaser",
  "private": true,
  "version": "0.0.0",
  "type": "module",
  "scripts": {
    "dev": "vite",
    "build": "tsc && vite build",
    "preview": "vite preview"
  },
  "devDependencies": {
    "typescript": "~5.6.2",
    "vite": "^6.0.5"
  },
  "dependencies": {
    "phaser": "^3.87.0"
  }
}
Now the project knows we are using Phaser.
In the same file, change these two lines this way:
{
  "name": "vite-phaser",
  "private": true,
  "version": "0.0.0",
  "type": "module",
  "scripts": {
    "dev": "vite --port 8080 --open",
    "build": "tsc && vite build",
    "preview": "vite preview --port 8080 --open"
  },
  "devDependencies": {
    "typescript": "~5.6.2",
    "vite": "^6.0.5"
  },
  "dependencies": {
    "phaser": "^3.87.0"
  }
}
What happened? When we launched npm run dev from Terminal, we just executed the script at line 7. Now with –port 8080 we set the port to 8080 and with –open we automatically open the browser window at the end of the process.
Same concept is applied to line 9. Try by yourself, write in Terminal
npm run dev
This way:

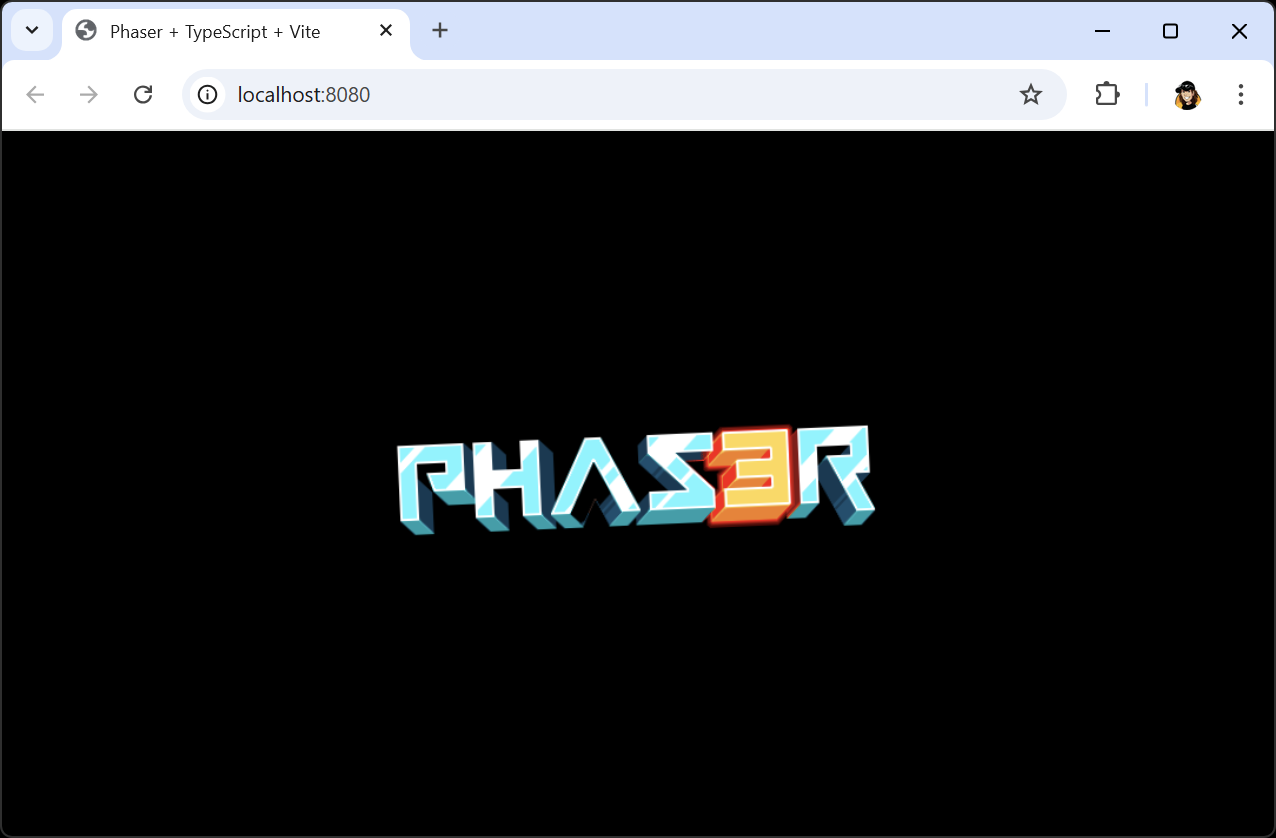
And you will see the page automatically open at http://localhost:8080/.
Time to remove some unnecessary files: I removed .gitignore, everything inside src folder except main.ts and style.css and everything inside public folder.
Since I also removed vite-env.d.ts which contained some TypeScript information, I am going to add a couple of lines to tsconfig.json:
{
  "compilerOptions": {
    "target": "ES2020",
    "useDefineForClassFields": true,
    "module": "ESNext",
    "lib": ["ES2020", "DOM", "DOM.Iterable"],
    "skipLibCheck": true,

    /* added by me */
    "types": ["vite/client"],
    "strictPropertyInitialization": false,

    /* Bundler mode */
    "moduleResolution": "bundler",
    "allowImportingTsExtensions": true,
    "isolatedModules": true,
    "moduleDetection": "force",
    "noEmit": true,

    /* Linting */
    "strict": true,
    "noUnusedLocals": true,
    "noUnusedParameters": true,
    "noFallthroughCasesInSwitch": true,
    "noUncheckedSideEffectImports": true
  },
  "include": ["src"]
}
Line 10 acts in the place of vite-env.d.ts, while line 11 sets strictPropertyInitialization to false to prevent TypeScript to raise an error when a class property was declared but not set in the constructor.
Now it’s time to write some code to turn this project into this official Phaser example.
First, let’s rearrange index.html:
<!doctype html>
<html lang="en">
  <head>
    <meta charset="UTF-8" />
    <meta name="viewport" content="width=device-width, initial-scale=1.0" />
    <title>Phaser + TypeScript + Vite</title>
    <script type="module" src="/src/main.ts"></script>
  </head>
  <body>
    <div id="thegame"></div>
  </body>
</html>
We can see three important things:
1 – There isn’t any stylesheet. This does not mean that we will not include styles in our web page, but we will do it somewhere else, in a more efficient way that also allows for their minification.
2 – At line 7 you can see we are including a TypeScript file. We know web browser can’t run TypeScript files, but don’t worry: Vite will take care of everything. Also look at the path: /src/main.ts. This is exactly the file we left in src folder.
3 – At line 10 there is a div whose id is thegame. Phaser project will run inside that element.
Talking about css, let’s edit style.css in src folder:
/* remove margin and padding from all elements */
* {
  padding : 0;
  margin : 0;
}

/* set body background color */
body {
  background-color : #000000;
}

/* Disable browser handling of all panning and zooming gestures. */
canvas {
  touch-action : none;
}
And now the most important file, main.ts in src folder:
import 'phaser';
import './style.css';

class PlayGame extends Phaser.Scene {
    image : Phaser.GameObjects.Image;
    constructor() {
        super('PlayGame');
    }
    preload() : void {
        this.load.image('logo', 'assets/phaser3-logo.png');
    }
    create() : void {
        this.image = this.add.image(400, 300, 'logo');
    }
    update() : void {
        this.image.rotation += 0.01;
    }
}

let configObject : Phaser.Types.Core.GameConfig = {
    scale : {
        mode        : Phaser.Scale.FIT,
        autoCenter  : Phaser.Scale.CENTER_BOTH,
        parent      : 'thegame',
        width       : 800,
        height      : 600
    },
    scene: PlayGame
};

new Phaser.Game(configObject);
Explaining the source code is beyond the scope of this guide, but it’s just the TypeScript version of this official Phaser example.
However, it is important to look at line 2: here is where we include style.css.
You will also need the Phaser logo to be copied in public/assets folder, here it is:
Now everything is ready to launch the Phaser project, as usual with npm run dev from Terminal, and you should see your Phaser page opening with something like this:
Warning: sometimes you may get an error message saying Error: EBUSY: resource busy or locked.
This is probably due to the way Dropbox saves and locks files. If you are working on a Dropbox folder, just pause sync while your project is being built.
Finally, let’s see how to export the project and create a distributable folder.
Exporting Phaser Vite project for distribution
Vite has a built in script to export project, so from Terminal just enter
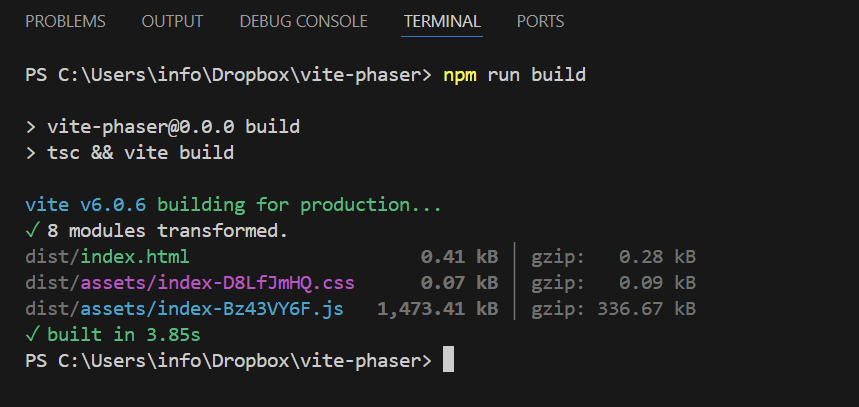
npm run build
This way:

Now you should find your distributable project in dist folder; let’s have a look at it:

What are these strange names in assets folder? It’s the way Vite handles distributable files.
Let’s have a look at index.html:
<!doctype html>
<html lang="en">
  <head>
    <meta charset="UTF-8" />
    <meta name="viewport" content="width=device-width, initial-scale=1.0" />
    <title>Phaser + TypeScript + Vite</title>
    <script type="module" crossorigin src="/assets/index-Bz43VY6F.js"></script>
    <link rel="stylesheet" crossorigin href="/assets/index-D8LfJmHQ.css">
  </head>
  <body>
    <div id="thegame"></div>
  </body>
</html>
As you can see, it changed a bit according to new file names, and the style sheet has been included.
You probably noticed we received a warning: Some chunks are larger than 500 kB after minification. It’s ok, but we don’t want to see this message anymore.
Vite reads, if available, a configuration file called vite.config.js in root folder.
Let’s create it with this content:
export default {
    build: {
        chunkSizeWarningLimit: 1500
    }
}
Now the limit is 1500KB, but you can set ever higher, and the warning won’t pop up anymore:
Let’s have a look at the .css file:
*{padding:0;margin:0}body{background-color:#000}canvas{touch-action:none}It has been minified. Good. But if you look at the .js file you will find a lot of comments like this one:
/* @author       samme
 * @copyright    2013-2024 Phaser Studio Inc.
 * @license      {@link https://opensource.org/licenses/MIT|MIT License}
*/
This is asbsolutely no good because we want to reduce its size as much as we can.
This is when Terser comes into play.
Terser is a modern JavaScript minification tool designed to compress and optimize JavaScript code.
It reduces the size of JavaScript files by removing unnecessary characters like whitespace and comments and minimizing JavaScript files for faster loading times and better performance.
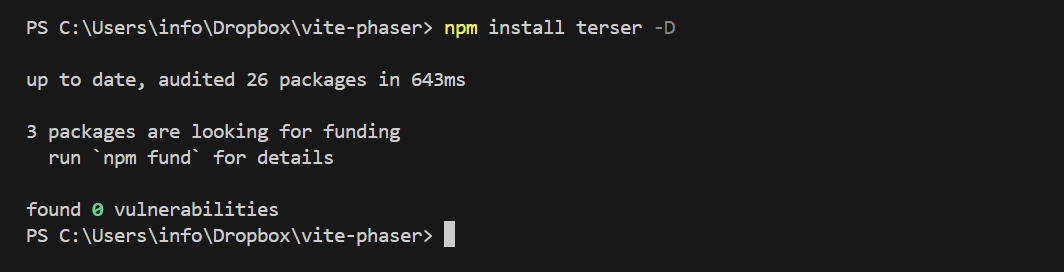
Let’s install Terser by writing in Terminal
npm install terser-D
This way:
Your package.json file should change this way:
{
  "name": "vite-phaser",
  "private": true,
  "version": "0.0.0",
  "type": "module",
  "scripts": {
    "dev": "vite --port 8080 --open",
    "build": "tsc && vite build",
    "preview": "vite preview --port 8080 --open"
  },
  "devDependencies": {
    "terser": "^5.37.0",
    "typescript": "~5.6.2",
    "vite": "^6.0.5"
  },
  "dependencies": {
    "phaser": "^3.87.0"
  }
}
What does that -D at the end of npm install terser mean?
The -D flag at the end of an npm install command stands for –save-dev.
It tells npm to install the specified package and add it as a development dependency in your project’s package.json file.
Now let’s configure it by adding some lines to vite.config.js file:
export default {
    build: {
        chunkSizeWarningLimit: 1500,
        minify: 'terser',
        terserOptions: {
            format: {
                comments: false
            }
        }
    }
}
We are telling Terser to remove the comments. There could be many more options to set, but this goes beyond the scope of this guide.
Now write in Terminal npm run build again and look at the content of .js file in dist folder; there shouldn’t be any comment.
In my case the total size dropped from 1,473.41kB to 1,190.65kB.
Finally you have a distributable result in your dist folder.
Have fun using Phaser and Vite!